Tampilkan postingan dengan label Photograf. Tampilkan semua postingan

Jumat, 09 Januari 2015

TRICK SHOT PHOTOGRAPHY

Indra Pratama     11.49    
Picture

DIRECTIONS

The purpose of this assignment is to test your ability to create “trick shot” special effects using the camera and basic editing skills with Photoshop. Listed below on this page are information and examples on the different types of "trick shot" photography.

FORCED PERSPECTIVE


In our daily lives we use perspective to visually perceive the distances of objects and ourselves. Distorting the perspective produces the illusion of abnormally large or small objects in comparison to the rest of the objects in the photograph. This effect is possible because a camera produces an image in two dimensions as opposed to our eyes that work in three dimensions. When we're unable to tell if the objects are actually further or nearer to the camera and assume it is actually of a similar distance, then objects appear smaller if they are further away while closer objects appear bigger. This is probably the simplest trick photography to pull off, as you only need to move your camera and the subject matter around until you get what you want.  

ANGLES

Picture
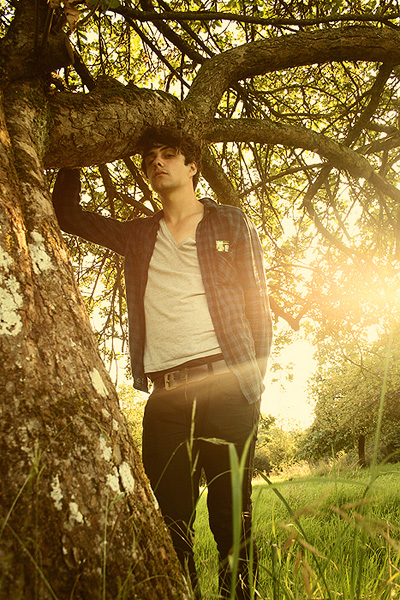
Another easy trick is to turn the camera on its side. With some creative poses, you can create mind-boggling images simply by turning your camera around. The trick to this technique is to shoot something that when turned to the side has a completely different meaning. For example, if you lie on the floor horizontally and take a picture with the camera rotated ninety degrees; it would look as if you're climbing up a sheer wall vertically.

LEVITATION

Picture

This is also a simple but very creative trick that will leave your viewers scratching their heads. You don't need Photoshop (but you could use Photoshop for this type - see more examples and technique here) to create pictures of people hovering a few inches off the ground. What you need is an able and willing model who is happy to keep jumping around on your command. You basically set a high shutter speed on your camera to remove any blurring that will destroy the illusion, ask your model to jump and then snap away. The more outrageous the mid-air pose, the more stunning it is.

Rabu, 07 Januari 2015

Tips on How to Eliminate Acne Naturally

Indra Pratama     14.34    
Tips on How to Eliminate Acne Naturally


1. How to Treat Acne With Egg White
To do that, separate the egg yolks and egg whites only grab. Whisk briefly and then apply to face and let sit for 15 minutes. The egg white will help reduce the oil on the face that often causes acne.

2. How To Treat Acne With Toothpaste
One thing to remember here toothpaste used is shaped pasta (like Pepsodent) not shaped gel (such as Close Up). Almost the same way both of the above premises. Apply toothpaste on acne and other parts around the pimples before sleeping. Let sit overnight / until morning and then rinse with clean water.

3. How to Treat Acne With Tomatoes
This fruit other than good for eye health is also quite effective at removing black comedones (blackheads). The first thing to do is slice the tomatoes in half and rub all over your face with acne and leave for 15 minutes - 1 hour and then rinse. and eat for the treatment of in.

4. How to Treat Acne With Aloe Vera
Caution Do not use the original tongue from the mouth of the crocodile yes, he,, Take a leaf of aloe vera, cut into several parts, peel the outer skin, apply at the emerging pimples, and repeat doing it this way every morning and afternoon. If you are patient enough, acne may be able to dry up and flake off for 3 days. In addition, aloe vera is also capable of removing stubborn acne scars. Once again the key is only one, painstaking. !!

5. How to Treat Acne With Garlic
There are two options in using garlic to get rid of acne. First with two or more mashing garlic until quite smooth and then applied to the facial acne. Let stand for 10 minutes then rinse. While the second way is to take one or more of garlic every day.
Many say this is quite efekktif both ways, but for those of you who do not like the smell of garlic might be better to take another way. Do not worry there are many other natural ways which I will explain below.

6. How to Treat Acne With Always Clean Face
Always take care of cleanliness face every day of dirt and dust on the road. For we are always active and dealing with road dust, so be diligent to clean the face before or after the activity. As consumption from the inside, then multiply eat vegetables and drink water. Those who do not like vegetables.!, Then fruit containing water can be an alternative in treating the face of the deep. Because of the content contained in fruits and vegetables are believed to make your face more clean and radiant.

Well a lot Not How, in fact many ways to get rid of acne does this, as long as we diligently to seek to know wrote, what now already easy really to look for the info, just open Internet, push tu BB or Android, and Dapet deh infonya, including you nyampe to this blog, hehe
Yes already good luck, be sure to leave a comment below yes, for sensation, hahah

8 ERRORS IN KOREA Dressed CELEBRITY FASHION EVENTS

Indra Pratama     12.32    
Korean celebrity appearances are often used as inspiration dress. However there are times when even those who should receive advice on how to dress the right way to look stylish in public. Here are eight South Korean star with errors dress, which successfully helped.


1. Gong Hyo-Jin


Having a career as a model background Lantan not make a movie star of 'The Master's Sun' is infallible dress. Hyo-Jin being invited guests in Seoul Fashion Week 2013 actually appear far from fashionable. He combines large coat, long skirt made of lace and jeans, black boots and do not forget rimmed glasses cat eye. All ornaments are charged 33-year-old actress 'successful' make it look like a shabby old woman.


2. Lee Hye-Young

Seoul Fashion Week 2014 S/S - Day 5

Present at the fashion show Lucky Chouette at Seoul Fashion Week Spring / Summer 2014, Hye-Young senior actress is wearing a dress with asymmetrical floral motifs gelepai detail combined with long boots decorated with a black belt. Hye-Young might want to look younger with the clothes she wears, but she just looks weird.


3. Lee Hyori
Seoul Fashion Week S/S 2013 - Day 5
The singer and actress is known for sexy fashion style. When present in a fashion show 'Steve J & Yoni P' at the Seoul Fashion Week, Hyori may want to show her edgy side. However blend tops lace tops, skirts transparent and denim vest torn accents make the appearance look messy.


4. Kim Na-Young

Seoul Fashion Week S/S 2013 - Day 3

This dress errors also occur at Seoul Fashion Week 2013, precisely at a local brand show Korea 'pushbutton'. Kim Na-Young stylish enough 'brave' with matching boyfriend jeans, a white T-shirt, ankle boots and a bright pink coat. All elements of the dress she was wearing nothing matching. Plus, boyfriend jeans that look oversized and long coat makes the body Na-Young looks 'sink'. Maybe it would be better if she wears skinny jeans or leggings.


5. Kang Min-kyung

Jain Song - Photocall- Seoul Fashion Week F/W 2014

Davichi's girl band personnel attending fashion shows Jain Song in Seoul Fashion Week Fall / Winter 2014. Whether you want to style Rebellious or look different than usual, Min-Kyung combines two outer at once, plus a T-shirt and torn jeans just above the knee. He successfully became the center of attention, but probably many who saw the strange sight.


6. Kang Ji-Young

Seoul Fashion Week S/S 2013 - Day 5
It is legitimate if you want to play the texture on the clothing. But how personnel girl band Kara is arguably less precise. Blend knit superiors and subordinates will make the wearer's skin may seem edgy. But if the peplum blouse 'peek' at the cropped sweater and black skirt makes the display Ji-Young becomes obscure.


7. Lee Yoon-Ji

2013 SBS Drama Awards

Mermaid cut dress can help mengaksentuasi female body shape, especially those with a shape like an hourglass. But the actress who made a mistake on this one dress when attending the 2013 KBS Drama Awards Long dresses are only limited to the ankle making Yoon-Ji appearance looks weird. Plus details strap high heels that are less suitable worn at formal events. Maybe it would be better if the dress she wore longer to reach the floor.


8. Lee Si-Young

"Tory Burch" Eau De Parfum Launching Party

Appearances star of the series 'Boys Over Flowers' and 'Playful Kiss' is supposed to be able to look chic and elegant as she approached the launch of a collection of Tory Burch Beauty. It's just supposed to Si-Young does not integrate a blazer and pencil skirt with a pair of black pipe. Stack technique which makes the appearance of Si-Young seemed too full. '

Add Google Analytics in Blogger

Indra Pratama     12.06    


Once you setup your blog and start publish quality content, its time to track the traffic statistics to know more about the visitors that who are visiting your blog, from where they are, how much time they spend on your blog etc. Google Analytics is the best tool provided by Google to easily track and check real and accurate stats of our blog traffic. Except this you can also check your blog’s bounce rate, unique visitors, page views and visits by adding Google Analytics to your blog. Tracking the traffic statistics of blog is very important if you want to know that what’s going on your blog and the behavior of your visitors. Now you are aware with the benefits of installing GA in blog so let’s see how to install it.

Create Google Analytics Account

Before adding GA tracking code to your blog you need a GA account. Follow below steps:
  1. Go to Google Analytics.
  2. Now sign in with your Google or Gmail account.
  3. Click on “Sign Up” button on the next page.
  4. Google Analytics Sign up
  5. Once you click the sign up button you will redirect to next page there you have to fill a simple form by entering your Blog Title, URL, your Country, Blog Category and Account name. You can enter your blog title as your account name or can choose anything else which helps you to recognize your blog. See below screenshot for complete process.
  6. Setting Up Your Web Property
  7. Once you fill all the details click on “Get Tracking ID” button.
  8. Now click on “I Accept” on “GOOGLE ANALYTICS TERMS OF SERVICE” pop up page.
  9. If everything is fine then you will get a Tracking ID like “UA-39654221-1″ at the top left corner and a Tracking code in a box. Now let’s go to the next step.

Add Google Analytics to Blogger

To add GA in your blog you have to perform 2 steps. First you have to add your Tracking ID inblogger settings and then put the tracking code in your template.
Adding Google Analytic ID to Blogger
  1. Go to Blogger >> Settings >> Other
  2. Now under the “Analytics Web Property ID” enter your Tracking ID in the text field.
  3. Tracking ID
  4. Click on “Save Settings” button.
Adding Tracking Code
  1. Go to Blogger >> Template >> Edit HTML
  2. Backup your blog template. (Read this: How to backup template in blogger?)
  3. Now search for
  4. And paste your Tracking Code just above it.
  5. Save the template.
  6. You are done!
Now you have completed all the process of installing and adding Google Analytics in blogger. It will take approx 24 hours to show your traffic report in Google Analytics. Happy Blogging!

Change Blogger Template

Indra Pratama     11.58    
When I start blogging on blogger, I used to run my blog on blogger’s default templates. But as I started learning more about blogging I feel that default templates are not so much attractive and professional. They are even not search engine optimized because they all was designed many years ago and don’t even updated a single time after that. Search engines like Google has updated its search algorithms many times and they are continuously updating to improve search results and user’s experience. That’s why it is very important for us as a blogger that we used a SEO friendly template for our blog. We should change our blog’s default theme with any third party templates. That’s why today I bring a tutorial to help newbie bloggers so that they can learn how to change template in blogger.
To change your blog template first you need to download a template from internet which you want to apply to your blog. There are many sources of blogger template on the internet from where you can get lot of professional templates easily for free. Just go to Google and search for “Blogger Templates” and download a template of your choice. Once you have your template, perform below steps.
  1. Log in to your Blogger account.
  2. Now click on the drop down menu and choose Template.
  3. Press Backup/Restore button located at the top right corner.
  4. backup restore button
  5. First you should download your existing template as a backup. So, click on “Download full template” button.
  6. download template
  7. Now click on Choose File button and choose your new template which you want to apply to your blog.
  8. choose template
  9. Once you select your template, simply click on Upload button for final step.
  10. You are done!
Note: If you just started your blog then you must read below tutorials to improve your blog performance.

Rosette Bracelet – Sew.Craft.Create (handmade)

Indra Pratama     11.51    

Want to make your own rosette necklace?  Or maybe you’re looking for creative gifts for the girls on your list that have EVERYTHING?
Well, I’ll show you step-by-step how to make these sweet and fabulous fabric rosette necklaces for yourself or to share.  They’re super easy and cheap…really cheap!  This beautiful necklace is the perfect touch to make you look like a million bucks on pocket change. Works for me!
fabric rosette necklace supplies
Start with a few simple supplies:
  • Clear Gel Tacky Glue {I’ve tried other glue and this is my favorite one…just a tip!}
  • Scissors
  • Fabric scraps – I used a linen type fabric, enough to tear 5 strips measuring 2-2 1/2” wide and 15” in length
  • 18-20” chain with connectors and clasp
  • Pliers {or you can use a completed chain}
The fabric is easy to rip if you make a tiny cut at the top of your fabric and gently start to tear.  It should tear straight with a nice messy edge.
Rosettes_thumb (1)
Make a ton of rosettes and add them to your gifts, make bracelets, decorate your home or create hair accessories.  You’ll be hard to stop once you start!
For this necklace I made 3 large rosettes {finished size 2-2 1/2”} and 2 smaller ones {finished size 1 3/4”}.
fabric rosette necklace collage 1
Step 1 – Start by folding the fabric in half and roll a tight center…maybe 4 or 5 rolls.
Step 2 – Add glue and start to twist your fabric like shown in the photo above. fabric rosette necklace collage 2Step 3 – Keep working your way around by adding a drop of glue and twisting every half turn or so.  Just try to keep it tight.
Step 4 – Once you reach the desired width of your rosette just cut the strip of fabric with 1-2” of fabric left.
Step 5 – Add a drop of glue to the bottom, center of your rosette {this is where you were holding it to start with}.
fabric rosette necklace collage 3
Step 6 – Fold the the fabric strip over the bottom of your rosette to secure it.  Trim if needed.
Once you have made all five flowers and they have been able to dry for 24 hours, you can finish your necklace.
Step 7 – Cut your chain to the desired length and attach the clasp with the connectors.
Step 8 – Line up your flower and cut a few pieces of fabric to attach to the back of the rosettes and hold them in the right shape.
fabric rosette necklace collage 4Step 9 – Flip your rosettes upside down and glue them to the fabric strips with the chain sandwiched inside.
Step 10 – Let it dry overnight.
Step 11 – Trim away the extra fabric.
fabric rosette necklace final photo 1
 That’s it!
fabric rosette necklace tutorial photo
Now you can make one in every color!  I get compliments on it wherever I go and I plan to make a few more for gifts.

iPhone 6 review

Indra Pratama     11.36    

The Apple iPhone 6: bigger, better, sleeker and faster


Why do we have the Apple iPhone 6? Well, despite record sales, the Cupertino brand was heading for a fall. Not this year, or the next. But the brand had been trading on the same phone for four years and something big was needed to keep it current.
So with that, the iPhone 6, and its bigger brother, theiPhone 6 Plus, were born to keep Apple at the sharp end of a market that was starting to lust after powerful, big screen smartphones with clever and premium design.
  • Buy your iPhone 6 today
The iPhone 6 certainly addresses a number of the problems Apple had developed, coming with a much larger screen (although not dramatically increasing the size of the phone) a boosted processor, better camera, improved battery and crucially: overhauled design.
This is the sixth iPhone I've reviewed now, and there's a real sense that this one is really rather different.
I wrote last year that Apple was becoming more aware that the time when it could define what consumers would buy in the smartphone is ending – and with the 4.7-inch screen, it's clearly had to admit defeat in the smaller screen market.
There will be some that will miss that screen size, maintaining that they don't want a bigger display on their phone – but nearly all of those people won't have spent any appreciable time with a larger device, and I believe that a good portion of you thinking you need a smaller phone will quickly come to appreciate the power a bigger handset brings without hurting quality.
iPhone 6 review
The phone fits very well in the hand
But while the iPhone 6 has answered a lot of the problems I've had with previous iterations of Apple's handsets, there are still some issues that still swirled when I handled the phone for the first time.
Why has Apple decided to not join the masses with a really high-res screen? Why is the iPhone still the most expensive on the market? Has it done enough to improve the quite dire battery life of previous models, especially at a time when many high-end Android phones are easily chugging through a day's hard use without thirsting for a charger's caress?
Let's take a quick look at the price - and it's not pretty.
In the UK, you're looking at £539 for the 16GB version, £619 for the 64GB option and £699 for the 128GB model. On a decent contract these start at around £45 per month, with roughly £100 for the phone up front, although you can shop around and get it for slightly less if you stray from the main networks.
That's a lot more than the competition, with most high-end contracts topping out at £38 for the main rivals, with less up front too.
In the US, the Apple iPhone 6 16GB is $199 on contract, 64GB comes in at $299 and the 128GB at $399. If you're planning to go off book, then it's 16GB at $649, 64GB available for $749 and a whopping $849 for the 128GB model.
iPhone 6 review
In Australia, the iPhone 6 outright pricing starts at AU$869 for 16GB, then jumps to $999 for 64GB and $1,129 for the 128GB version. If you prefer to pay off your phone over time, Optus is offering the 16GB for $0 on a $100 monthly contract over 24 months, Telstra has the same model for $0 on a $95 monthly plan and Vodafone will give you the 16GB iPhone 6 if you sign up for 24 months on an $80 a month plan.
The iPhone 6 Plus, meanwhile, costs AU$999 for 16GB, AU$1,129 for 64GB and AU$1,249 for 128GB. On contract to get a 16GB model for $0, you'll need to spend $95 a month with Telstra, or $100 a month with Vodafone, both on a 24 month contract.

Design

Let's take a look at the first thing most people will wonder about before picking up the iPhone: how will it actually feel in the hand?
This is a big departure for Apple, marking a time when it's admitted that the industrial, sharp design of the last four iPhone models is a little outdated and needs to up the ergonomics to really compete.
iPhone 6 review
Well, with the Apple iPhone 6 we're looking at one of the thinnest and sleekest handsets in the market. It's got a strong combination of metal back (which feels exceptionally premium, borrowing bucketloads of design language from the iPad Air) and the way the screen curves into the chassis gives it a slight lozenge feel.
iPhone 6 review
One of the thinnest phones in the world
The iPhone 6 looks the business, and at 6.9mm thin it's very nice to hold. I do still feel that phones that push harder on ergonomics are a better choice though - the HTC One M8 bows out at the back and fits in the palm a little better - but that's quibbling. This iPhone just feels really well made.
Apple has always favoured a flatter phone than the rest of the market though, and placed on a desk it looks great. It does feel great in the hand too, but as said others impress more if I'm being hyper-critical.
There's also the issue of the large plastic strips that flow through the top and bottom of the device. Given metal is a nightmare material to try and get radio signal to penetrate, these are clearly there to offset that.
iPhone 6 review
The plastic strips detract and are not flush with the chassis
While the plastic does seem to give good performance for signal for the most part, it's nothing amazing, and to my eyes they're a little unsightly and ruin the sleek back of the iPhone 6, and their presence seem at odds with Apple's design ethos.
The other big design change is to the power button, which has now been moved to the right-hand side of the phone. This makes a lot of sense, and given the phone is now a larger device at 138.1 x 67 x 6.9 mm hitting the top of the handset is a much harder task, so moving the button is the right thing to do.
Like the rest of the exterior buttons, the power key is raised and easy to hit in both left and right hand modes. It's metallic and crucially doesn't have the same rattle that I criticised on the iPhone 5S.
The new raised buttons
However, that doesn't mean the metallic keys don't have a little wiggle to them. Running your hand up and down the sides idly will result in you noticing a very slight looseness to the power and volume buttons... I'm in danger of being too critical here, but for the price it's not the sort of thing I expect to see.
The other important design change here is the camera now protrudes slightly on the rear of the phone. It's good to see that happening, as it shows that Apple isn't willing to compromise on camera quality in order to just whack in a thinner phone.
The protrusion is a little worrying in that laying the Apple iPhone 6 down flat on a table could see scratches appearing, but the sapphire glass that covers the lens should see that's pretty safe.
iPhone 6 review
The camera protrudes but you won't notice it day to day
The rest of the iPhone 6 is very similar to the iPhone 5S, with the speakers at the bottom flanking the Lightning port. Well, I say speakers: it's just the one speaker, but thanks to the slightly elongated bottom of the phone you won't cover it when holding the phone in landscape.
This was irritating when trying to game or watch a movie without headphones on older iPhones - but this upgrade, combined with the lightness of the iPhone 6, mean you won't have a similar problem for the most part as the hands sit lower and free of the speaker generally.
Sadly the headphone port still resides at the bottom of the iPhone 6, meaning you'll still probably get your phone out of the pocket the wrong way around when listening to music.
Let me make one thing very clear though: the Apple iPhone 6 is another iconic handset in terms of design for Apple. It's not the best looking on the market (I'm still giving that title to the HTC One M8) but it's definitely right up there, and for the price I'd expect nothing less.
iPhone 6 review
The iPhone in Space Gray
You can pick up the iPhone 6 in Space Gray (the colour I've had on test here), or the more standard silver or gold. Whichever one you want is up to you, but there had better not be a shortage of the champagne gold colour again this year.
That made me sad to see so many clamouring for a colour just because it was hard to get hold of.

15 Settings, Techniques and Rules All New Camera Owners Should Know

Indra Pratama     10.16    

1. Digital Camera Modes Explained – I spoke with a family friend recently who had just bought a new point and shoot camera. She came up to me with her camera when no one was watching and embarrassedly asked me if I could tell her what all the little icons on the dial on top of her camera meant. This article explains what each of these most common digital camera modes means and does. Knowing them can take your shots to the next level.
2. Aperture and Shutter Priority Mode – this introduction talks you through these two very useful settings that can be found on many digital cameras. Aperture and Shutter Priority modes take you out of Automatic mode giving you more control over your images – but don’t thrust you fully into manual mode – they are great settings to explore and master.
3. Introduction to White Balance – one of the most common problems that I see in beginner photographer images are shots with incorrect color. We’ve all seen them – portraits where your subjects teeth and eyeballs (and everything else) has a yellowish tinge. Learn what causes this and how to combat it with this tutorial on White Balance.
histogram.jpg4. Understanding Histograms – ‘histograms are scary’ – this is what one reader said to me recently when they discovered that they could view these little graphs or charts on their camera. While they might seem a little technical it is amazing how simple a histogram is to interpret. Know what you’re looking for and with just a glance you’ll know if your image is under or over exposed. It’s a useful tool to master.
5. Automatic Exposure Bracketing (AEB) – this feature is another of those often unexplored settings that many cameras have built into them that will allow you to get well exposed shots in even the trickiest of lighting situations.

Other Basic Camera Techniques

How to Hold a Camera
6. How to Hold a Digital Camera – this beginner tutorial covers a topic that most camera owners skip over without realizing that it is a foundational lesson in photography. Get this wrong and it can impact the quality of your shots.
7. Shutter Release Technique – another ‘basic’ or ‘beginner’ type tip that many do intuitively – but which can drastically improve your photography if you don’t do it.
8. How to Use Focal Lock – yet another beginner technique that many of us take for granted yet which is at the core of how all digital cameras focus automatically. Get this wrong and you’ll take a lot of shots of out of focus subjects and in focus backgrounds!
9. How to Take Sharp Digital Images – ‘my shots are fuzzy’ – it’s a common problem that we’re asked about at DPS so we wrote this tutorial to refer people to to help them get the sharpest images that their camera can take.
10. Shooting with an In Camera Flash – flash photography with an in built flash can lead to some terribly blown out images – here are a few tips on how to avoid them. On a similar topic – here’s 7 Strategies for Avoiding Flash Blow Out.
11. How to Get Shallow Depth of Field in Your Digital Photos – a great technique to learn if you’re into many types of photography (portraits, macro etc) is how to control the depth of field in your shots and make your main subject ‘pop’ out by making your background nicely blurred – this tutorial talks you through how to do it.
12. Understanding Exposure – this post talks new camera owners through the three main elements of Exposure. Once you’ve read it also check out our introductions toISOAperture and Shutter Speed.

Camera Care and Maintenance

camera care
13. How to Avoid a Dirty DSLR Sensor – one of the fastest ways to ruin every single shot you take with your new DSLR is to end up with a dirty image sensor. This tutorial gives some basic tips on how to ensure it stays as clean as possible.
14. How to Clean a DSLR Lens – as much as you try to protect them – lenses tend to get a little grimy over time. This tutorial shares some basic tips on how to clean them up so that your shots will be as clear as possible.
15. 7 Digital Camera Predators and How to Keep them at Bay – this tutorial talks you through 7 of the most common ways that digital cameras get damaged – what to look out for and what preventative action to take to avoid them.

Source

Set Up and Shoot an Enchanted Photoshoot in the Woods

Indra Pratama     10.08    


Twice a month we revisit some of our reader favorite posts from throughout the history of Phototuts+. This tutorial was first published in September, 2009.
In this article Miguel will be taking you through the process of a portrait-based outdoor photoshoot on a budget. The only things you need to recreate this collection of images are yourself, a friend or client, a camera with a lens and the great outdoors. This set of tips will show you that you don't need an expensive setup of lenses, reflectors and lights to create stunning portraits to be proud of.
This series of portraits was recently taken for a local client to serve as promotional shots for his solo musical project. His brief to me was that he wanted the photographs to not necessarily feature himself as the main focus, but rather of the beautiful surroundings with himself within them. He didn't want the photos to be cliché or cutesy, and he requested that they were to be as natural as possible.
In the following steps I hope to show you what it takes to nail an outdoor photoshoot with as little equipment as possible, cover the difficulties you might encounter, and share several killer tips for working in the field—no pun intended! You can catch the full collection of these images on Flickr.
  • Canon 400D Digital SLRenchanted woodland photo shoot camera with standard 18-55mm lens kit. For this purpose, try to use a DSLR for best results, but any digital camera can be used as long as it has some manual control of exposure.
  • Model/subject with an extra change of clothes. One reason it's smart to bring an extra set of clothes is that if you get one outfit dirty within 15 minutes, you don't have to call off the rest of the shoot since you'll have a backup change of clothes. Another reason you might do this is purely for variety. Different outfits instantly make your set of photos more versatile as a package, and this is a bonus for both your portfolio and the client's promotional material.
  • Adobe Photoshop, for post-processing the photographs.
Choosing the right time and weather conditions
Believe it or not, a sunny day is a pain for taking portraits more often than not. You get models squinting in the sunlight, nasty blown-out skin highlights as well as incredibly difficult to tame exposure—you either end up with shaded areas that are too dark or brightly lit areas that are too bright. It's a nightmare!
Slightly duller and cloudier lighting can be the best to diffuse the light evenly, and even if the photos look dull in-camera you can always add the needed punch later in Photoshop. Remember—it's next to impossible to bring back detail in a photo. This applies to blacked-out shadows and blown-out highlights, so ideally you'll want tonal information in both ends of the light spectrum.
Time-wise, the best period of the day to shoot is just after sunrise, or for the lazy, just before sunset. This time period skips the intense afternoon sun that creates harsh lighting conditions and it can create lovely long shadows due to the sun being so low in the horizon. But make sure it isn't too close to sunset either, as light escapes quicker than you realize. A good rule of thumb I have is to go out and shoot approximately one-and-a-half to two-hours before sunset. This set of photos took place between 17:30 and 19:30 during early August in the UK.
enchanted woodland photo shoot
Camera settings
For the vast majority of the photographs, I shot in Av mode which adjusts the shutter speed automatically to calibrate against the desired aperture. During this mode, you'll want to have your aperture on about 5.6 to make sure you still get nice, sharp focus, though you can go as open as your lens allows if you find the shutter speed is slower than 1/30.
If you still find that with the widest aperture your shutter speed is still too slow, you may need to increase the ISO at the cost of some grain in the image (and DSLR grain is not the good type of grain).
Many would advise you to use a tripod, but I personally feel the dynamics of doing a natural photoshoot with a tripod to be too slow and cumbersome. Ideally, you need to constantly move around, be creative, get down low and up high from one shot to the next, which isn't possible with a tripod. It definitely feels less organic and you want to keep a fast paced, positive uplifting atmosphere with your model.
Having said that, it doesn't hurt to be prepared if you need to capture that one shot that seems to come out blurry every time.
Another thing I'd like to mention is that I find the automatic metering (be it with shutter, aperture or full automatic) will come out too bright. If you have the option, move the exposure metering down a couple of notches so the automatic modes create a slightly more low-key photograph. I tend to find the shadow areas are easier to recover light detail from than the overly bright areas.
enchanted woodland photo shoot
When you are in the woods at this sort of time, you can usually find pools of light on the floor created by the sunlight leaking through the trees, which breaks up the shadows they cast. The aforementioned long shadows created by a low sun can be integrated within these 'pools' of light to create interesting light compositions.
Setting your lens on its widest angle setting and getting close to the floor will emphasize the length of the shadow—as you can see in the image below. When making light and shadow your main concept in an image like this, having your subject face away from the camera and letting the sun create a rim of light around the figure can add to the charm of the image.
enchanted woodland photo shoot
Don't be afraid of the dark side
In areas of little light where the foliage is slightly denser, you can still position your subject to be mainly illuminated from behind by the sun, creating a nice rim light effect that can pop part of your subject from the background in these dim situations.
enchanted woodland photo shoot
Try to add depth to your composition
When composing a photograph like this, one of the first steps I tend to take is to find a foreground to help add depth to the photograph. It's nice to always have a foreground, middle ground and background in an image. If you get nice and low, you can usually find foliage to frame your subject. If you can incorporate a layer between the lens and the subject, that's perfect. Try it!
enchanted woodland photo shoot
Be creative with your focus
This step goes hand-in-hand with the previous. If you experiment with focusing on the foreground rather than your middle ground, you can be pleasantly surprised with the results. Doing so will add variety and interest to some of your photos, and I think you'll agree that just because the model isn't the main focus, this image is still just as good as the rest.
enchanted woodland photo shoot
Experiment with tilting your camera sideways slightly. This can instantly make the feel of your image very different. It adds a certain edge that can make your shot.
enchanted woodland photo shoot
I previously mentioned not to be afraid of the dark side. This applies equally to the bright side. You can position your subject so that he or she is facing the sun sideways, then position yourself in front of him or her and adjust your angle until you get a slight lens flare. There is nothing wrong with a bit of lens flare, but please use this sparingly! When used well, it can create a nice washed-out vintage dreamy effect.
enchanted woodland photo shoot
A low angle can work well when trying to emphasize a figure
In this shot I tried to make the model the focus point so that he demands attention, and getting down low and using the tree trunk as a lead to the top of the image helped me achieve that. When shooting from below you tend to make a person seem menacing and authoritative, and similarly when you photograph someone from above they tend to be diminished and made to seem less important.
enchanted woodland photo shoot
Some photographs work better as black and white images
In this particular shot, the original colors seemed to suck the life out of the photo. In Photoshop you can desaturate an image and then give it a subtle color tint. This will turn your photo into a more 'artsy' shot. Like in the example below, it makes the difference between binning a shot and keeping it in the final collection. When you think a photo doesn't really work for you but there's something about it that makes you wonder what could be done to salvage it, I suggest trying to desaturate it to see how it works in black and white.
enchanted woodland photo shoot
Over the next few steps I'll show you how I normally edit shots such as these, and the techniques I used when trying to bring that glowing warm essence of a summery forest to life before handing the shots over to the client.
The first thing you do when you open an image in Photoshop is to crop the image if needed. Next, you may want to duplicate the original layer into a new layer so you can always strip it back to the original if needed at any point, even if you mainly use adjustment layers.
enchanted woodland photo shoot
You may need to adjust the contrast using a Curves adjustment layer, but the contrast of this image is pretty well balanced from the camera as it is. In that case, you would proceed to create a new Gradient Map adjustment layer, and tone it so that it goes from a warm orange to a lighter, yellower tone.
enchanted woodland photo shoot
Bring the opacity of the Gradient Map layer to about 30% (or whatever looks best with your image). You can now start to see a more vintage and washed out tone.
enchanted woodland photo shoot
Create a new Curves adjustment layer and adjust it so as to darken the shadow areas of the image, and set this adjustment layer's mode to Luminosity.
enchanted woodland photo shoot
A neat tip to help force attention on the middle of the photo is to create a new empty layer and fill it with Black, then get the Eraser tool with a soft round brush set to about 20% opacity, and start to erase into the main focus of the image so as to darken the edges of the photo. One thing I'd advise you to do is to always erase light areas such as light sources (the sun in my case), as otherwise they will look obvious when a vignette is applied to them.
enchanted woodland photo shoot
Drop the Black layer to around 15%, as this effect looks best when used subtly. The Layers palette should look something like the one below.
enchanted woodland photo shoot
Once you've saved your .Psd copy of the image you can flatten the layers, resize the image for web—which in this case is 600px high—and then slightly sharpen it by going to Filter -> Sharpen -> Sharpen. If the image looks overly sharp, you can fade the last applied effect by pressing Cmd+Shift+F, and in this example I set fade to 40%.
That's it! You can then save your image. However, if you're applying this look to a lot of photographs you could save a template version as a .Psd file right at the step before you applied the vignette, so that the adjustment layers are all still editable. Once you have another document open, you can simply drag these adjustment layers to the new image and adjust them as needed.
enchanted woodland photo shoot

© 2011-2014 Look & Read. Designed by Bloggertheme9. Powered by Blogger.